Using Actions to activate or deactivate AI Conversation to user.
The process described is a series of steps for using actions to activate or deactivate AI conversation with users on Facebook and Instagram. To begin, the user must navigate to dash.marketingmaster.io and select the Facebook & Instagram option. From there, they can click on Chatbot Flow Builder and create a new Messenger Flow, giving it a name and selecting a text element to configure a message for the user. They can then add buttons for activating or deactivating AI conversation, configuring the actions to either activate or deactivate the AI using the OpenAI Embedding. The user must ensure that the values for the actions match and add confirmation messages for both actions. Finally, they can save the flow and click OK to finalize the process.
The feature works by utilizing actions to trigger the activation or deactivation of AI conversation with users. When a user clicks the appropriate button, the corresponding action is triggered and the AI is either activated or deactivated using the OpenAI Embedding. This allows for personalized and relevant responses to customer inquiries, improving the overall customer experience and reducing the workload for customer service representatives.
One potential use-case for this feature is a customer service chatbot for an e-commerce business that receives a high volume of inquiries on their Facebook and Instagram pages. By using actions to activate or deactivate the AI conversation, the chatbot can provide quick and accurate responses to common customer inquiries while still allowing for the option of human support when needed. This can help to improve customer satisfaction and reduce the workload for customer service representatives, allowing them to focus on more complex issues.
Difference Between Chatbot Actions for Activating/Deactivating AI and Chatbot OpenAI Embedding Element.
Chatbot Actions for Activating/Deactivating AI:
When the AI is activated, it will respond to every user message until it is deactivated.
Chatbot OpenAI Embedding Element:
The AI will respond only once to the latest user message. Any subsequent messages from the user will not be handled by the AI and will be processed by the bot's normal flow.
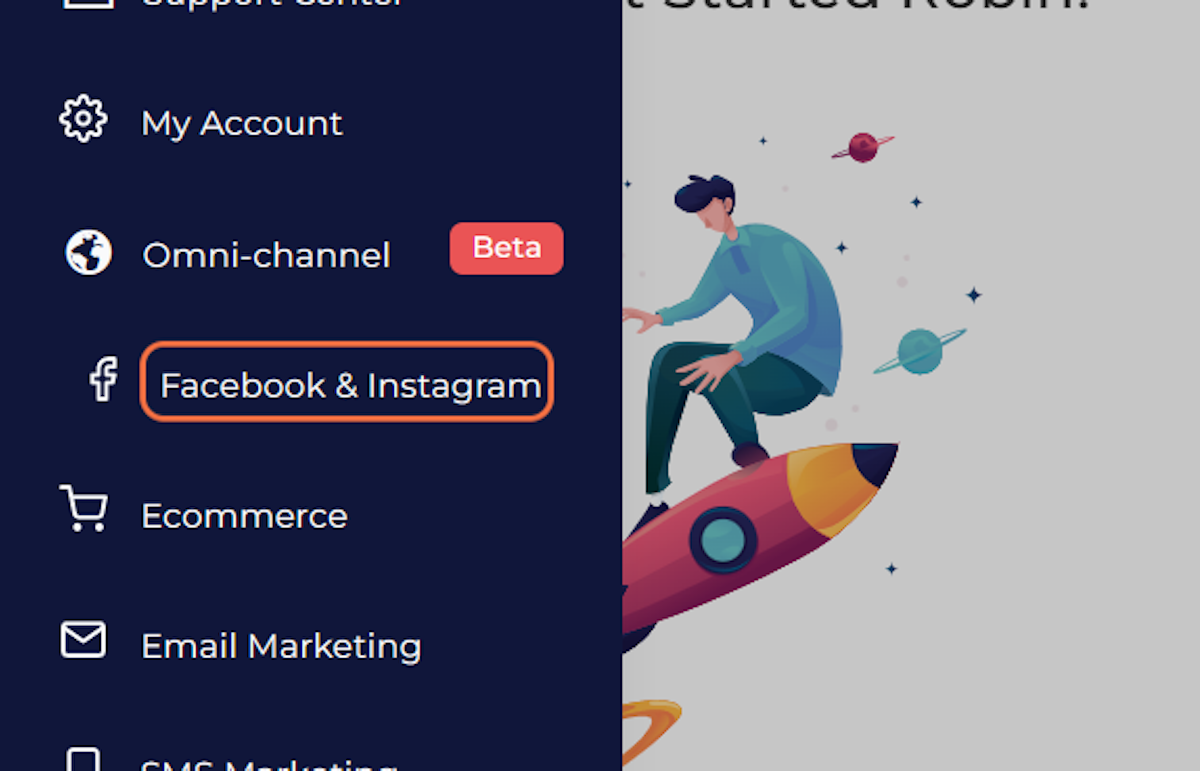
1. Go to dash.marketingmaster.io
2. Click on Facebook & Instagram
3. Click on Chatbot Flow Builder
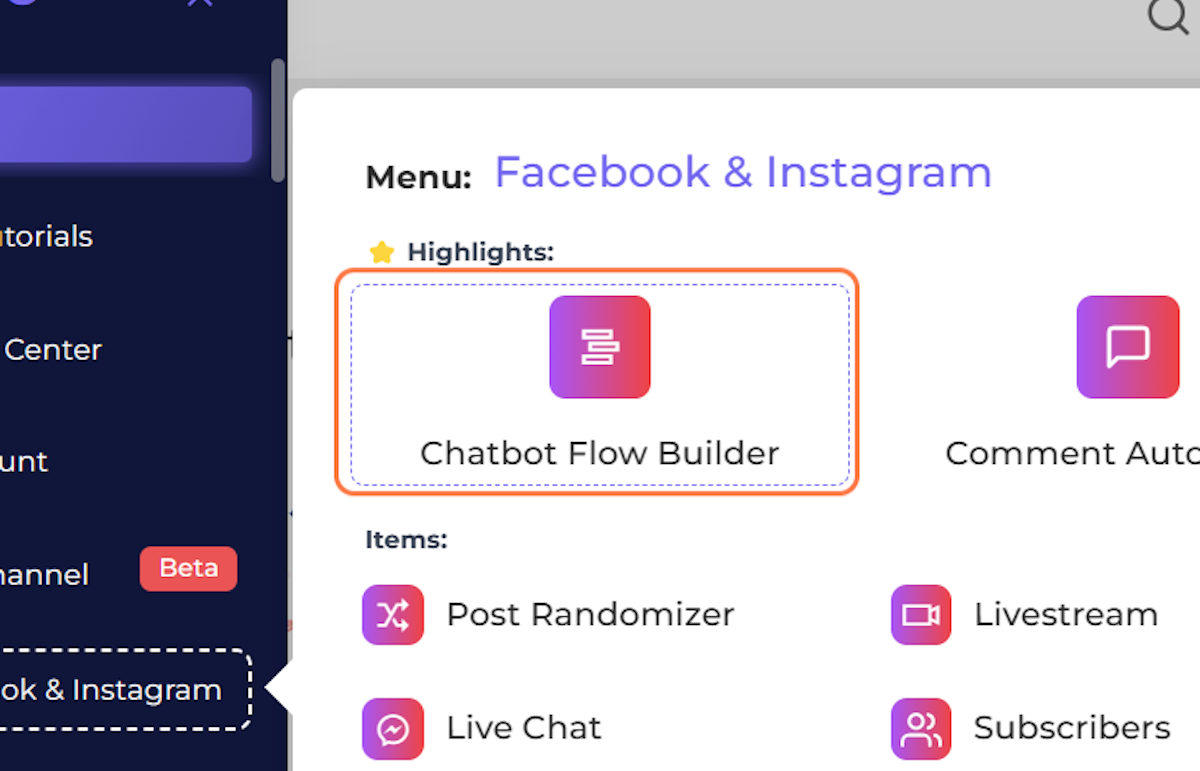
4. Click on Create messenger Flow
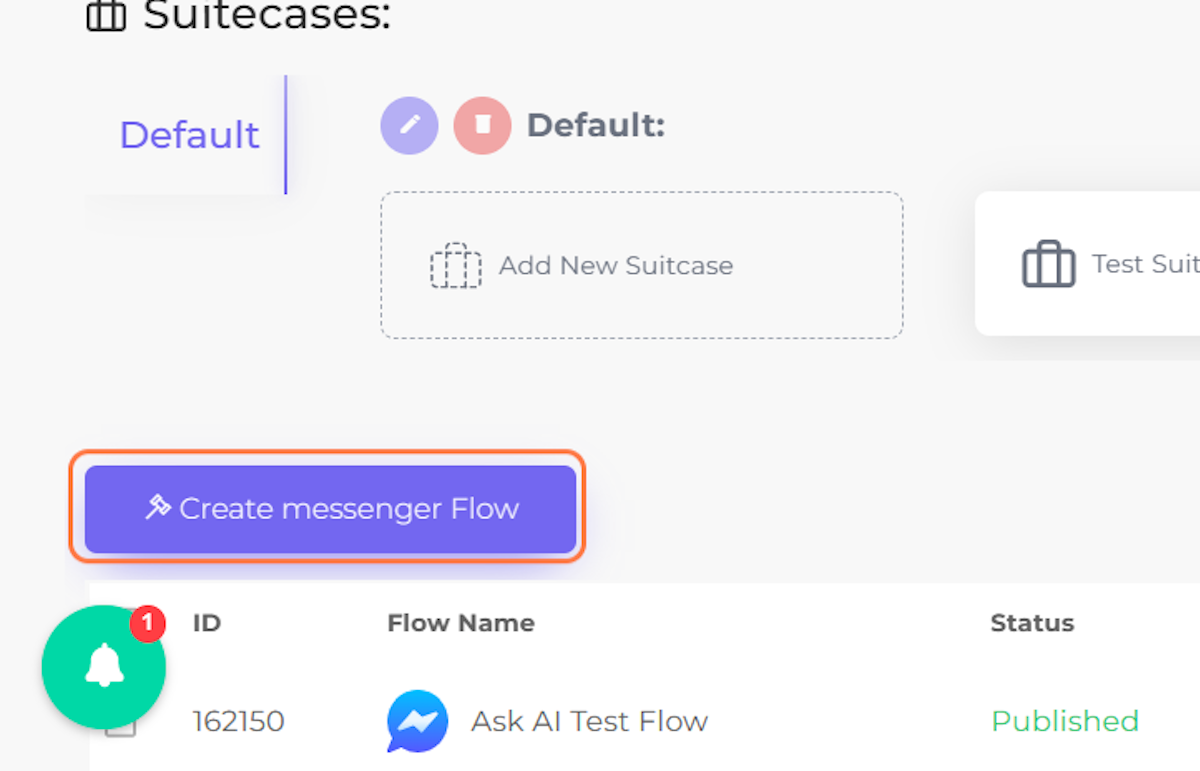
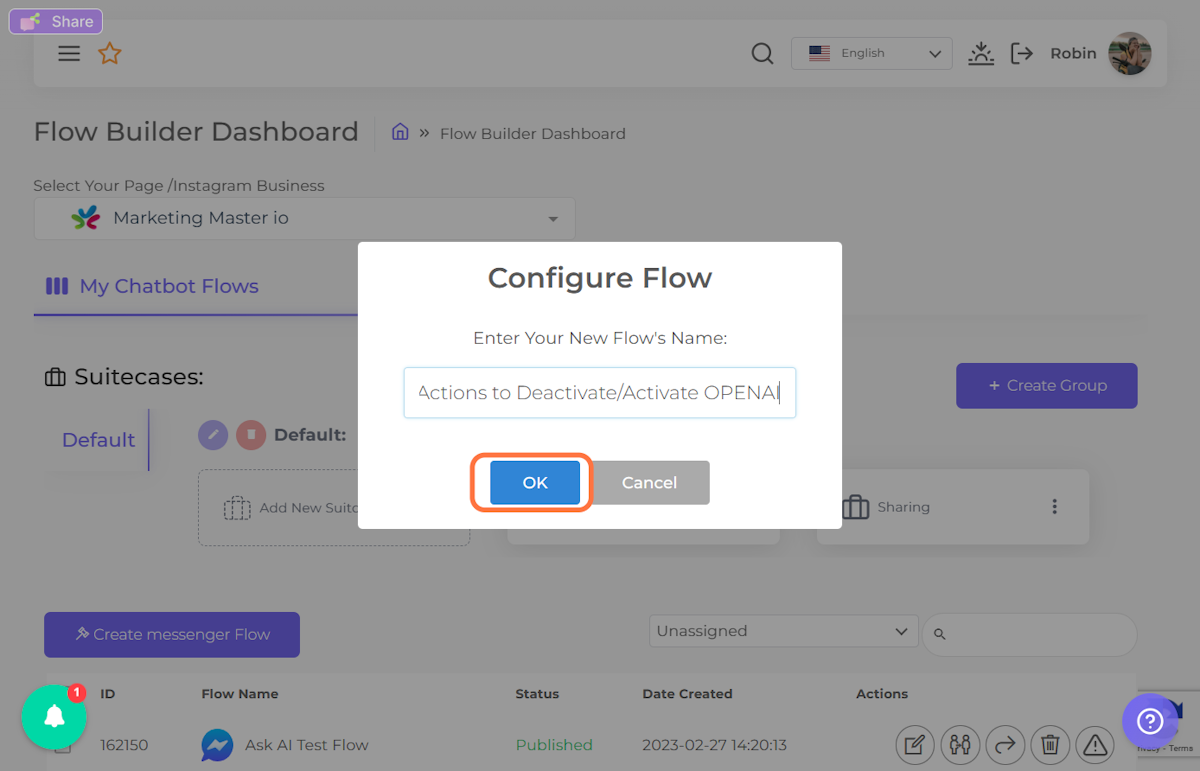
5. Name your Flow then click OK
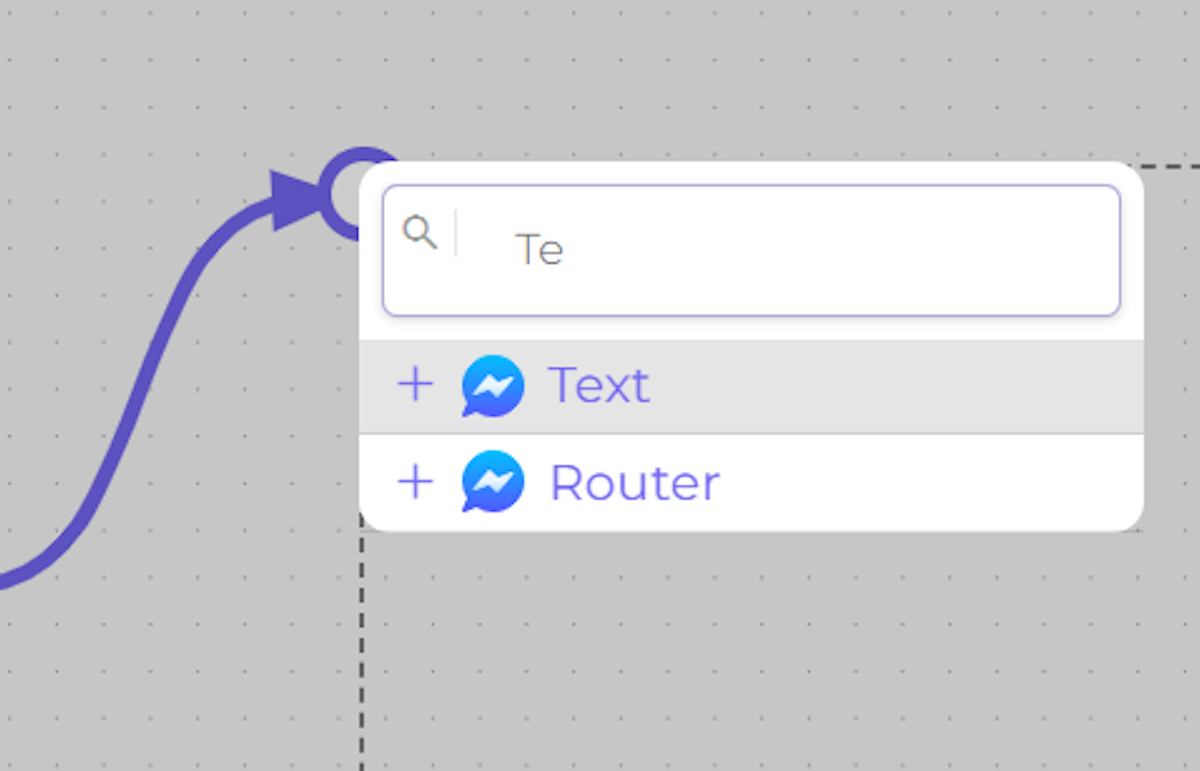
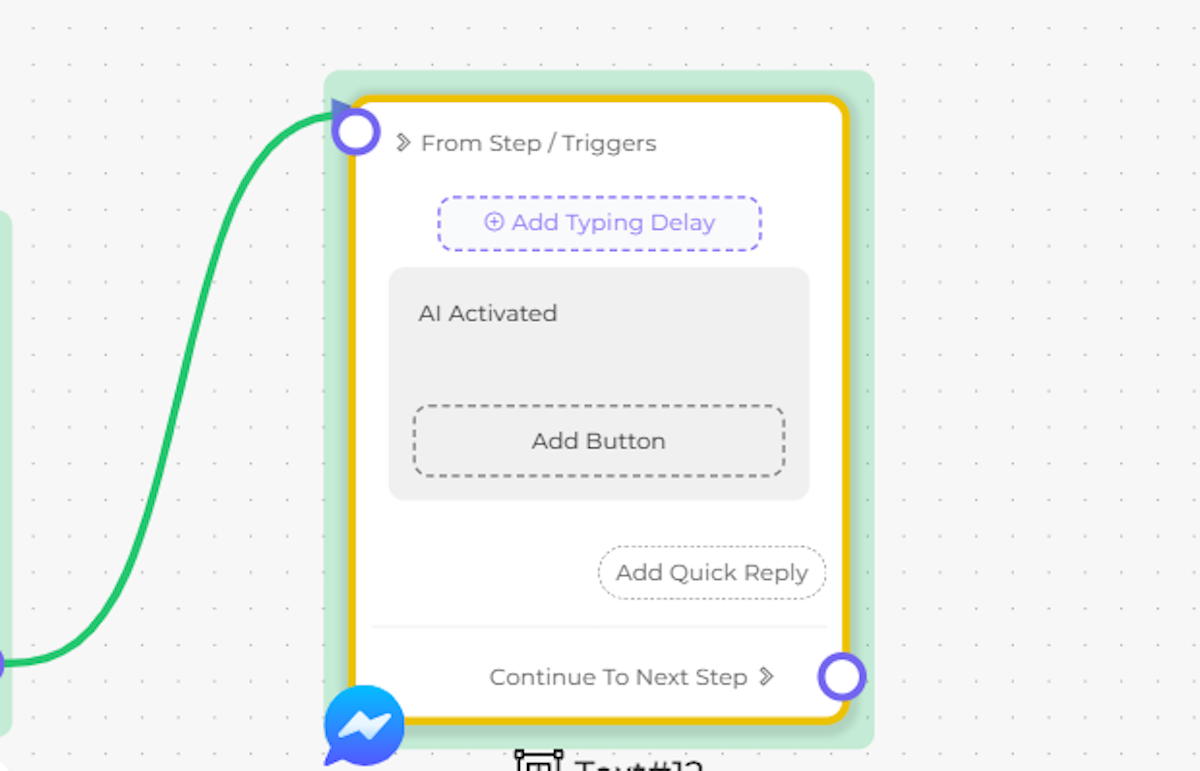
6. Select Text Element
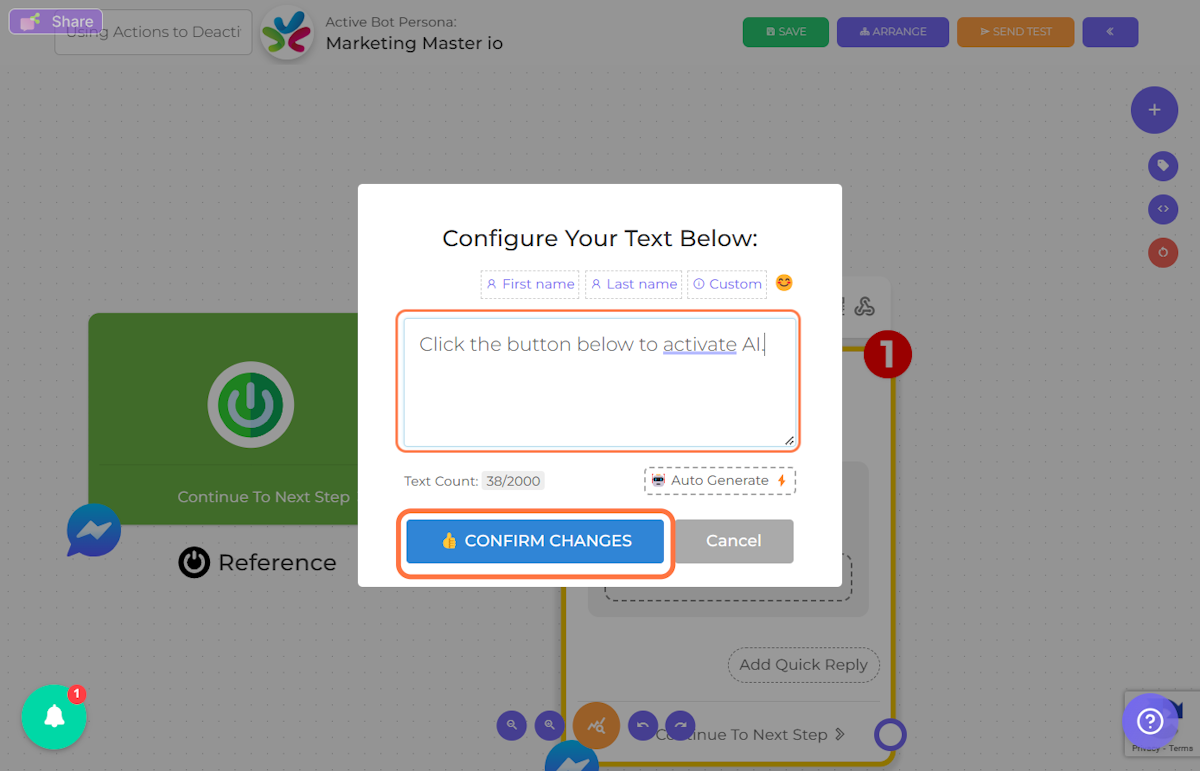
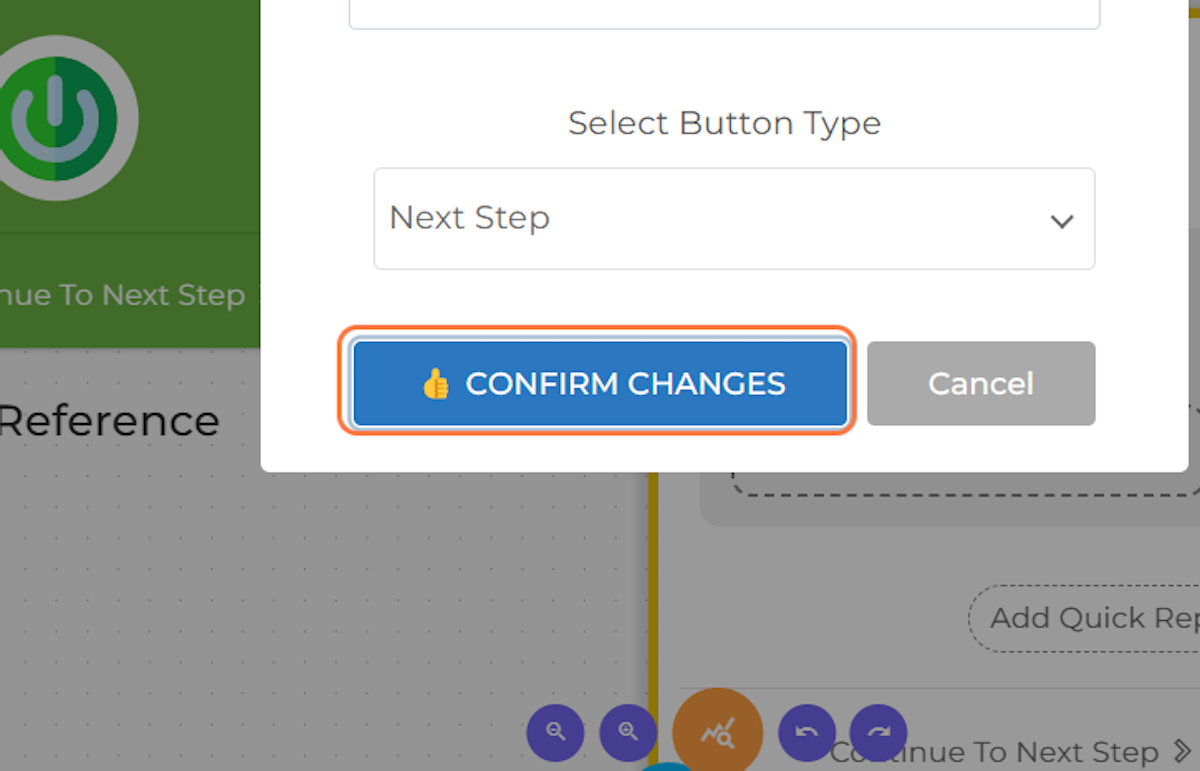
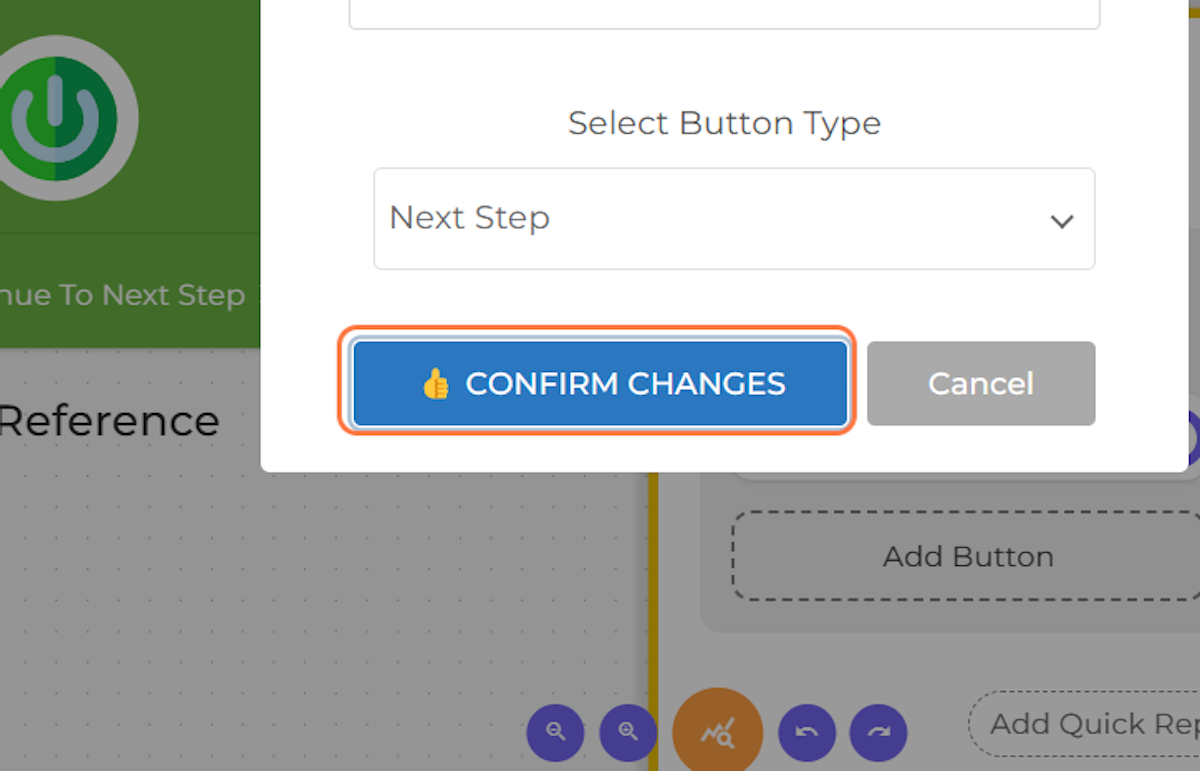
7. Configure your message then click "CONFIRM CHANGES"
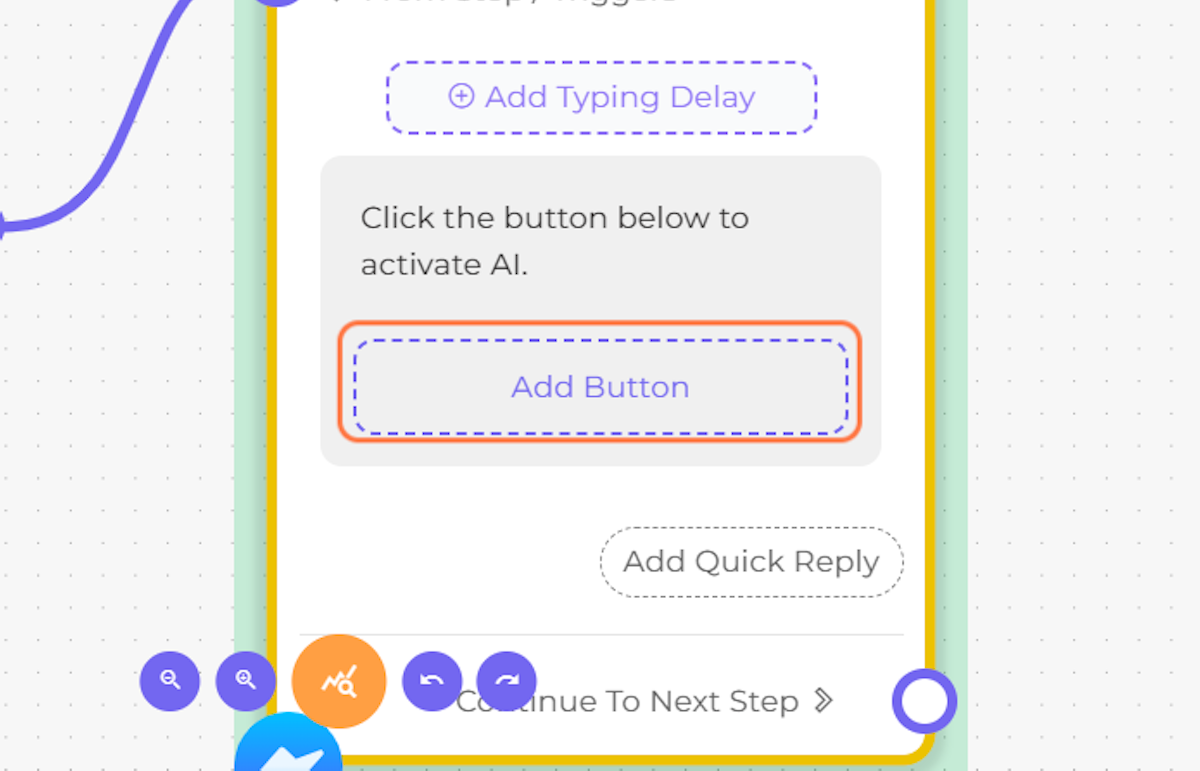
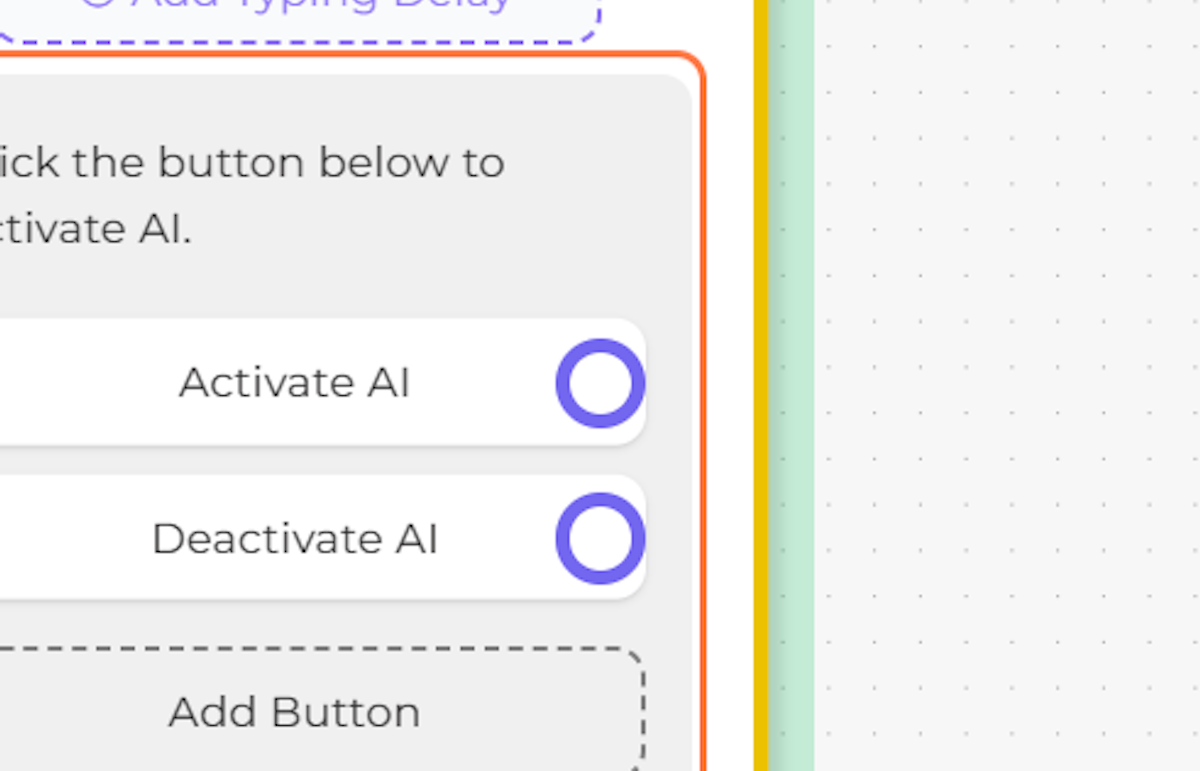
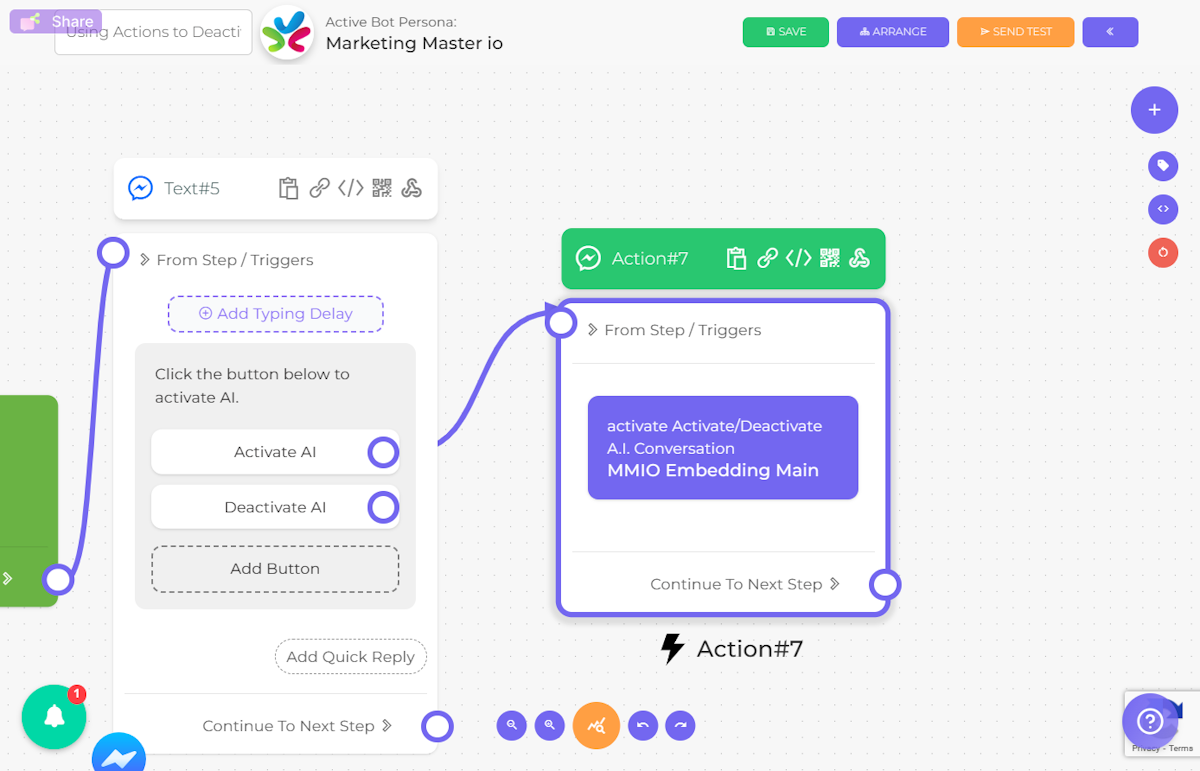
8. Click on Add Button
9. Type "Activate AI"

10. Click on dialog
11. Click on Add Button
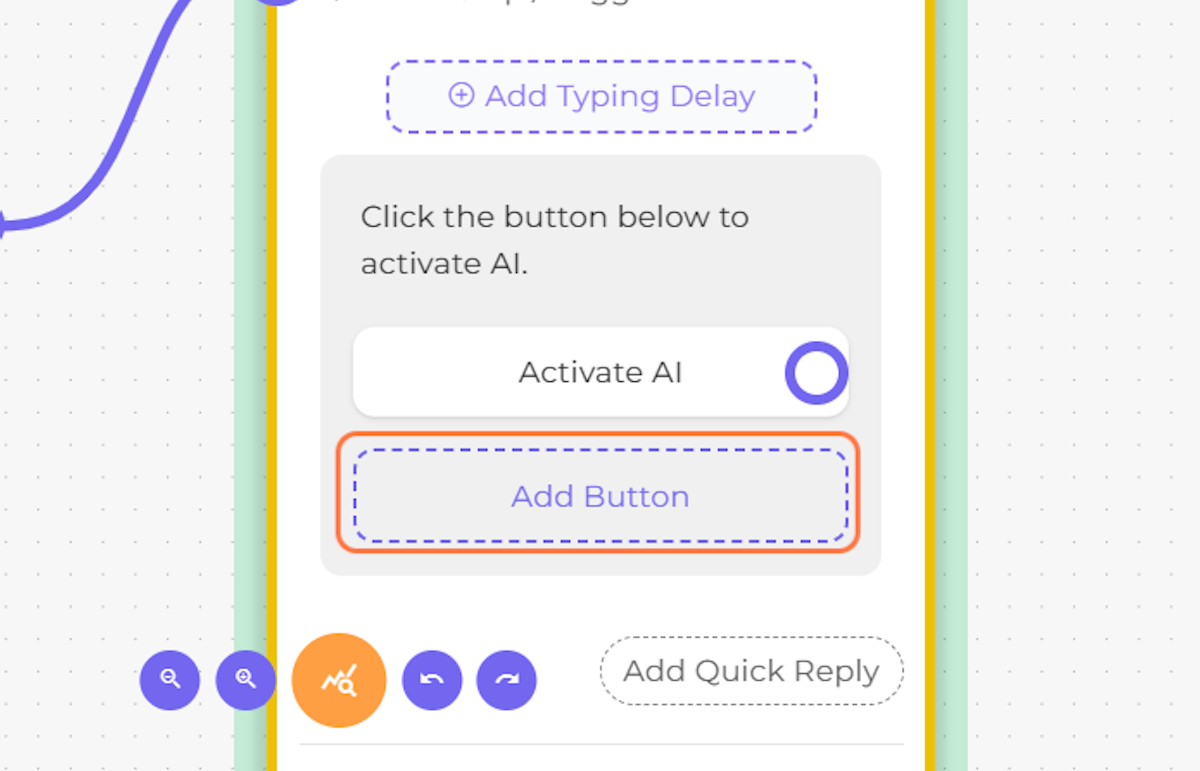
12. Type "Deactivate AI"
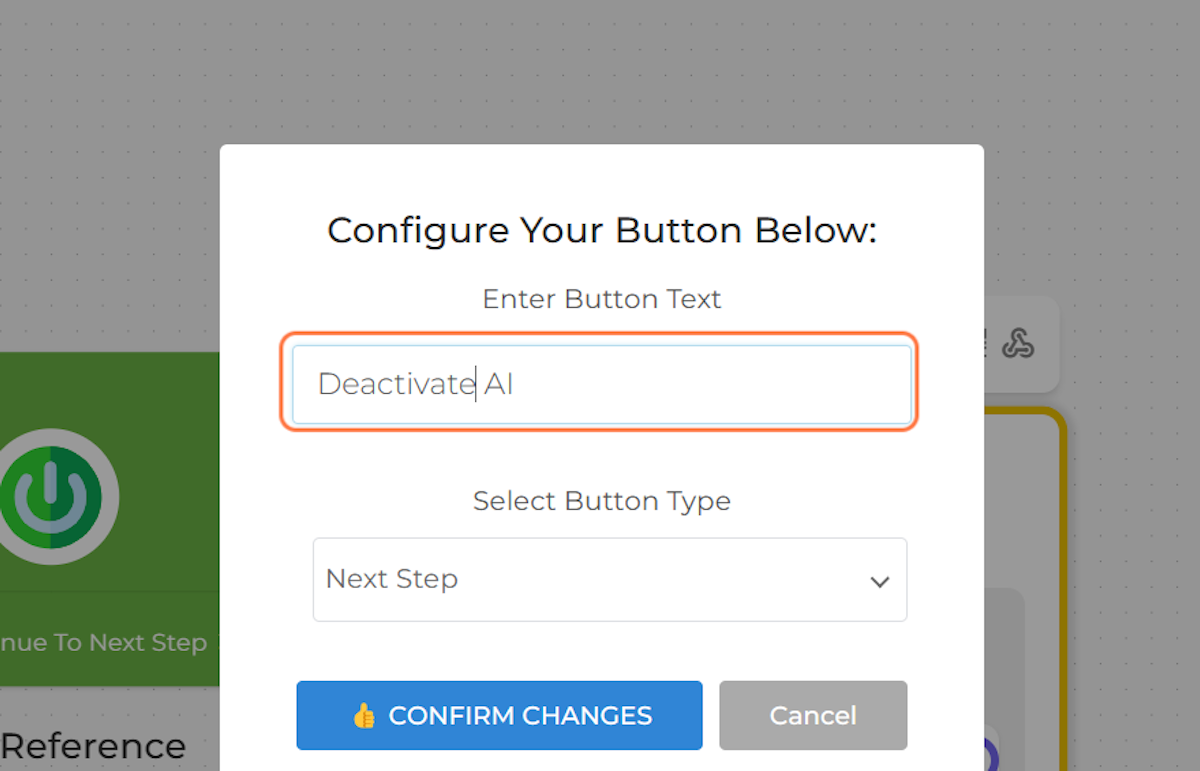
13. Click on Next Step
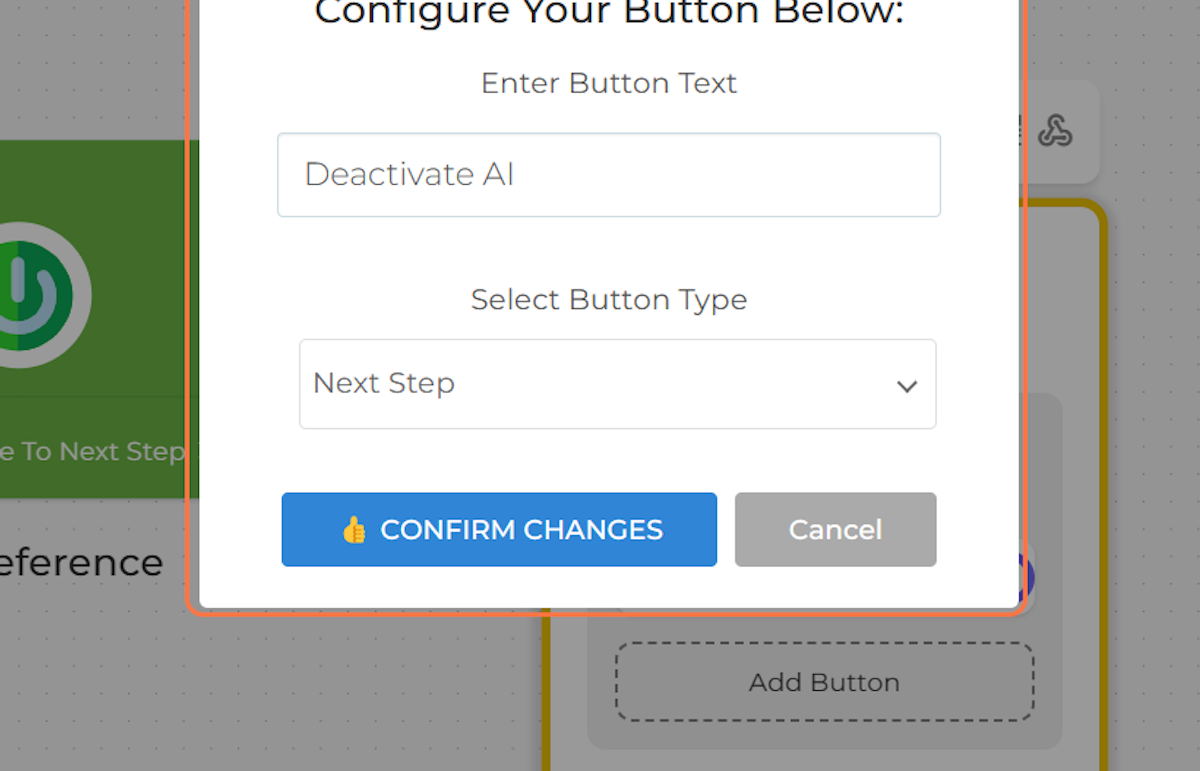
14. Click on dialog
15. Click on Activate AI
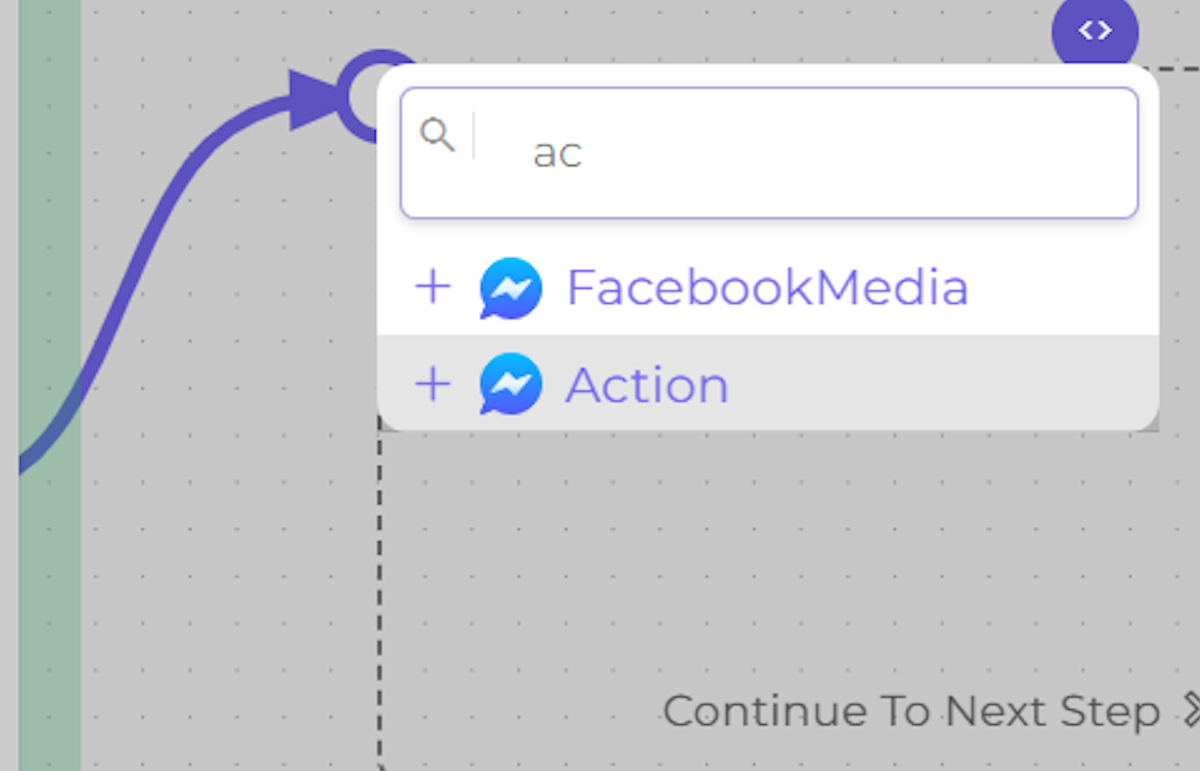
16. Type "ac"
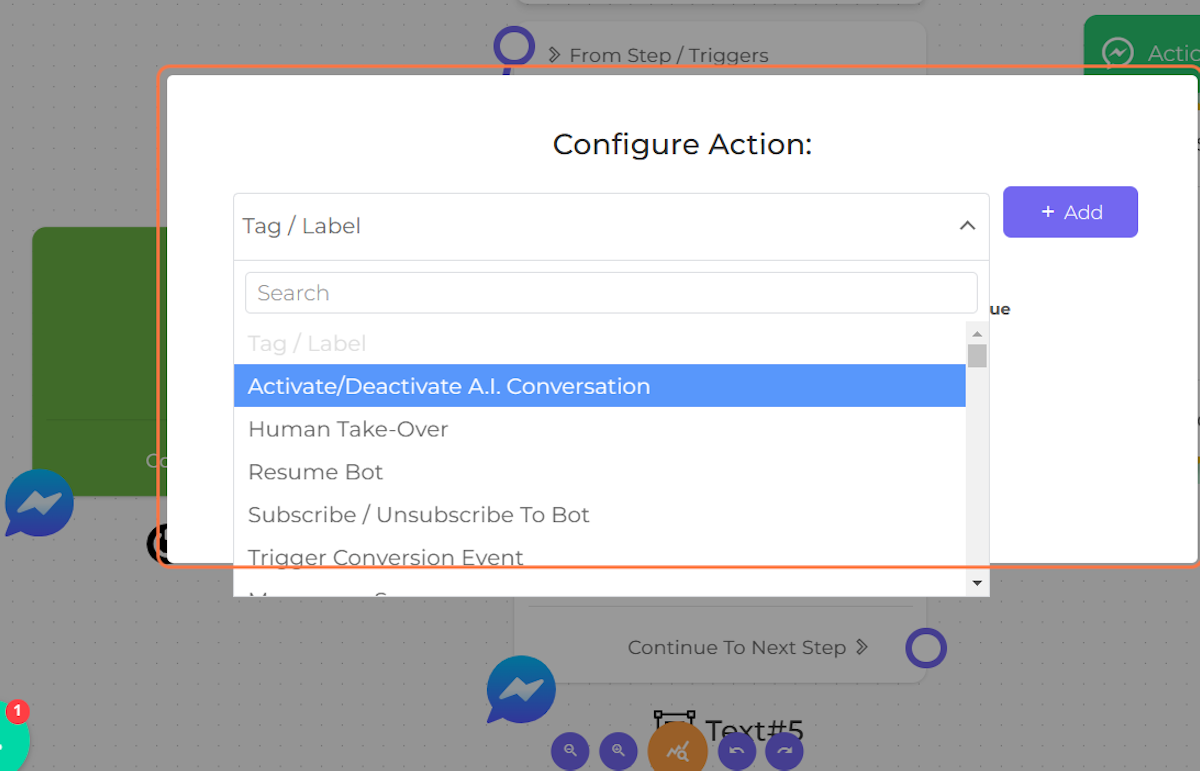
17. Click on Action
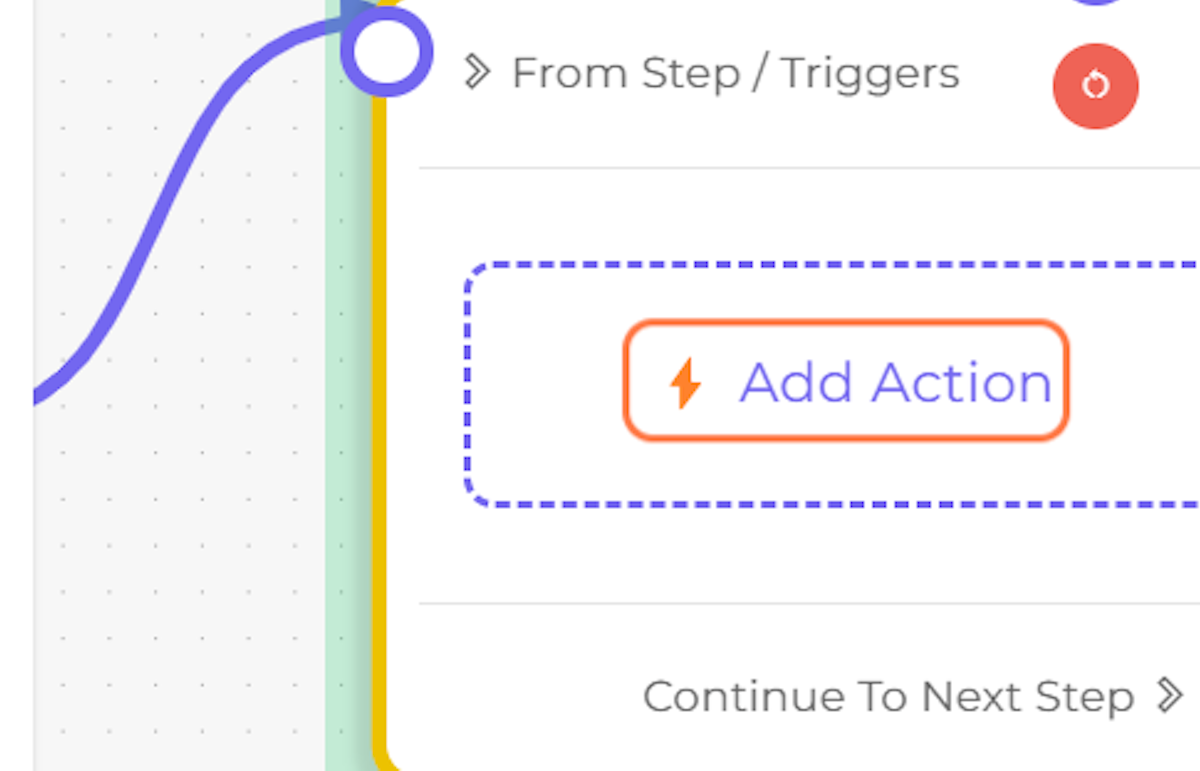
18. Click on ⚡️ Add Action
19. Select Activate/Deactivate A.I Conversation
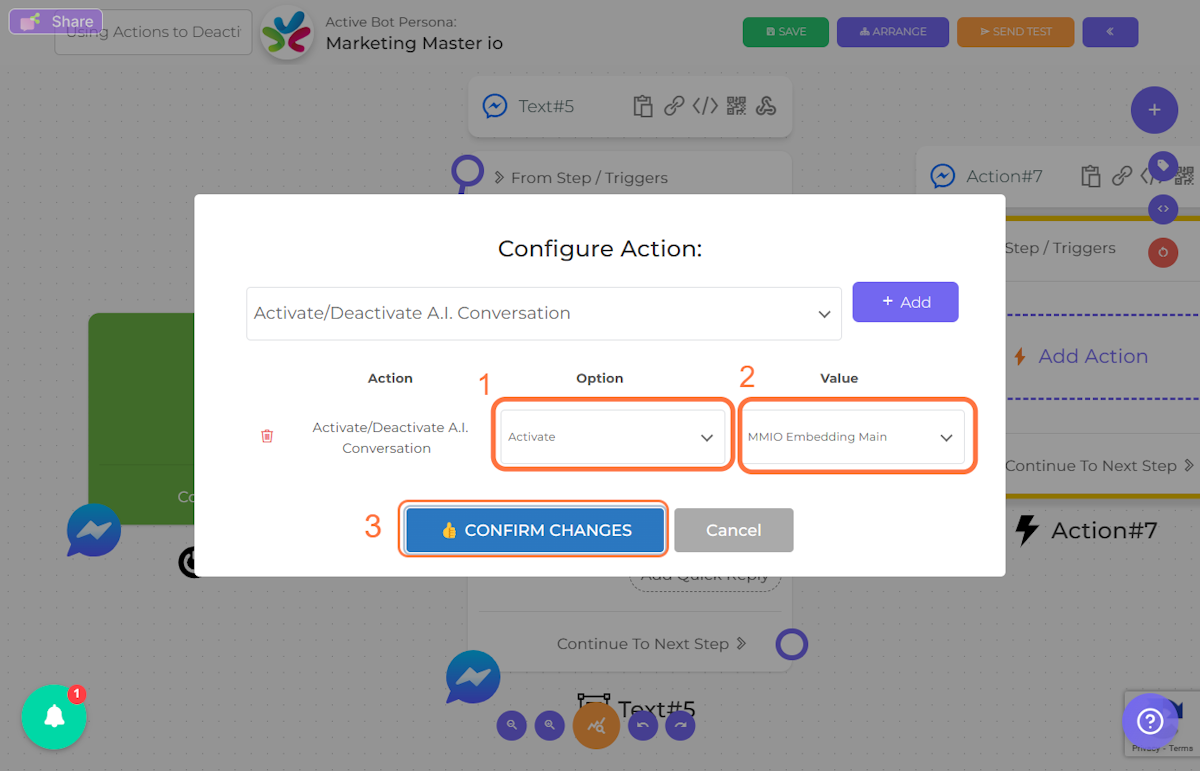
20. Choose "Activate" option then your OpenAI Embedding then click "CONFIRM CHANGES".
21. Drag highlighted element
22. Click on Configure Action:…
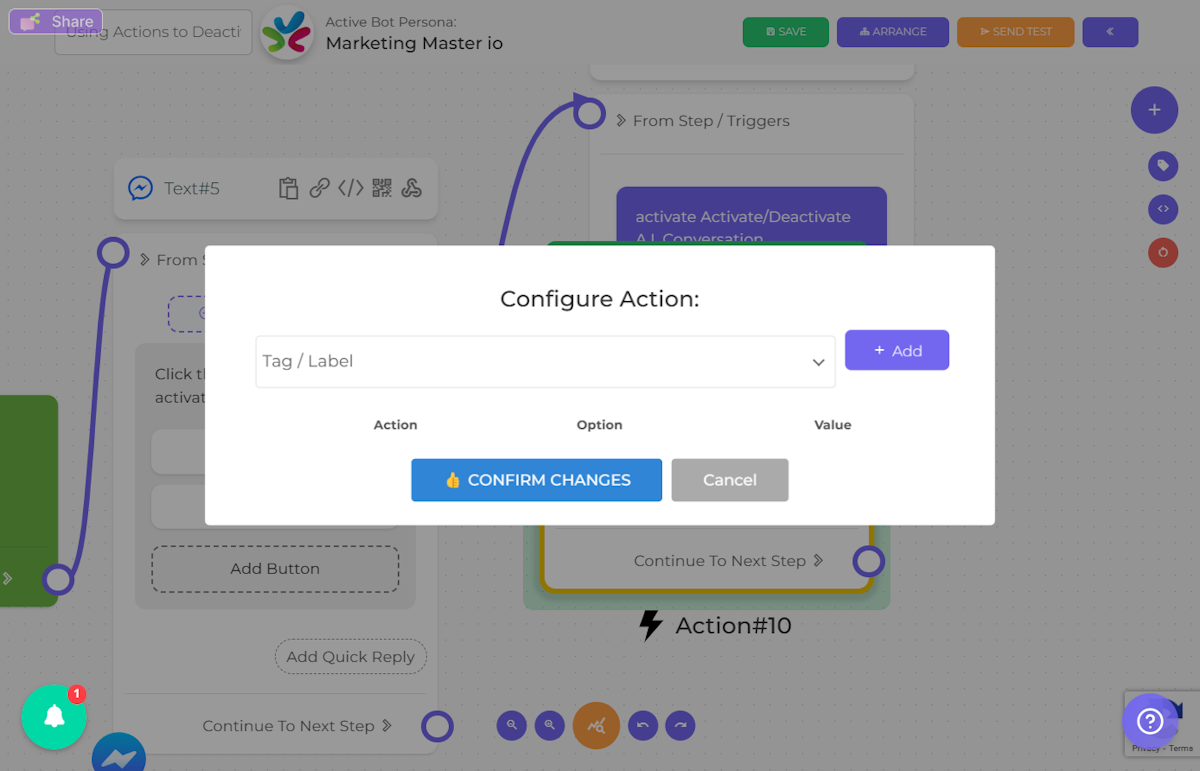
23. Choose "Deactivate" option then your OpenAI Embedding then click "CONFIRM CHANGES".
Please ensure that Value is the exactly the same with the activated action.

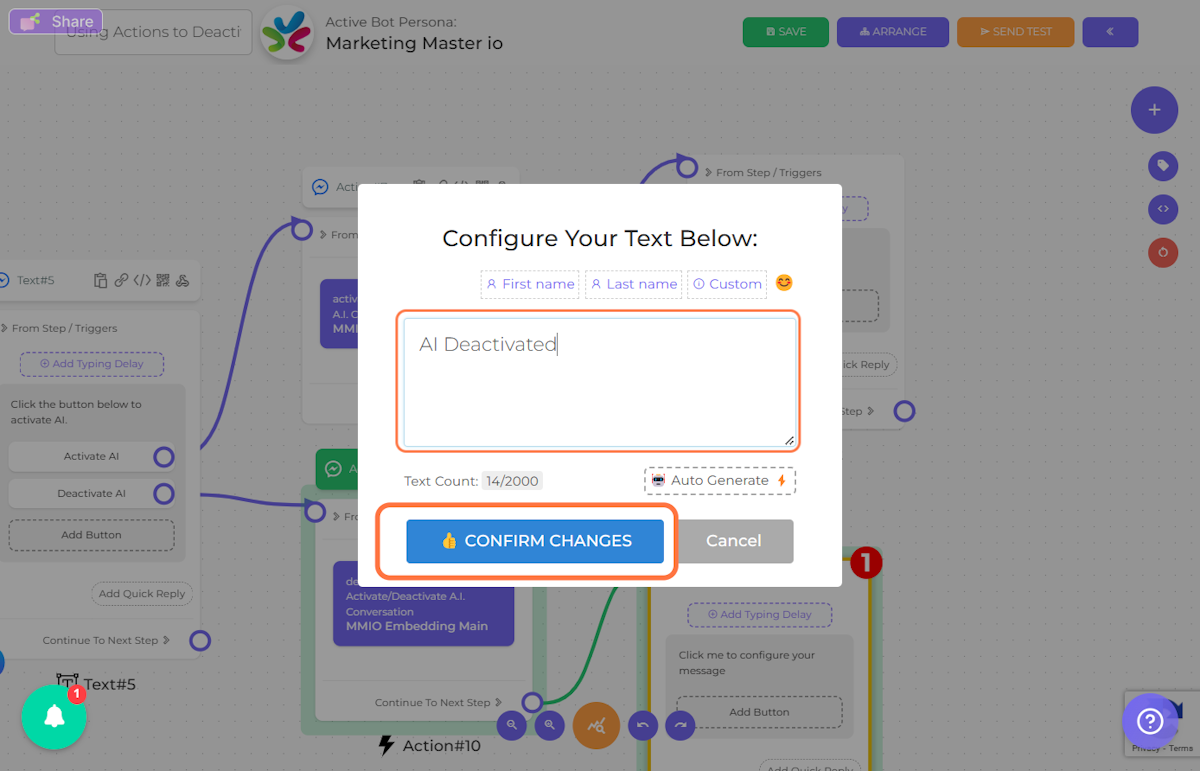
24. Add a confirmation message that the AI has been activated. Then click "CONFIRM CHANGES"

25. Drag highlighted element
26. Add a confirmation message that the AI has been deactivated. Then click "CONFIRM CHANGES"
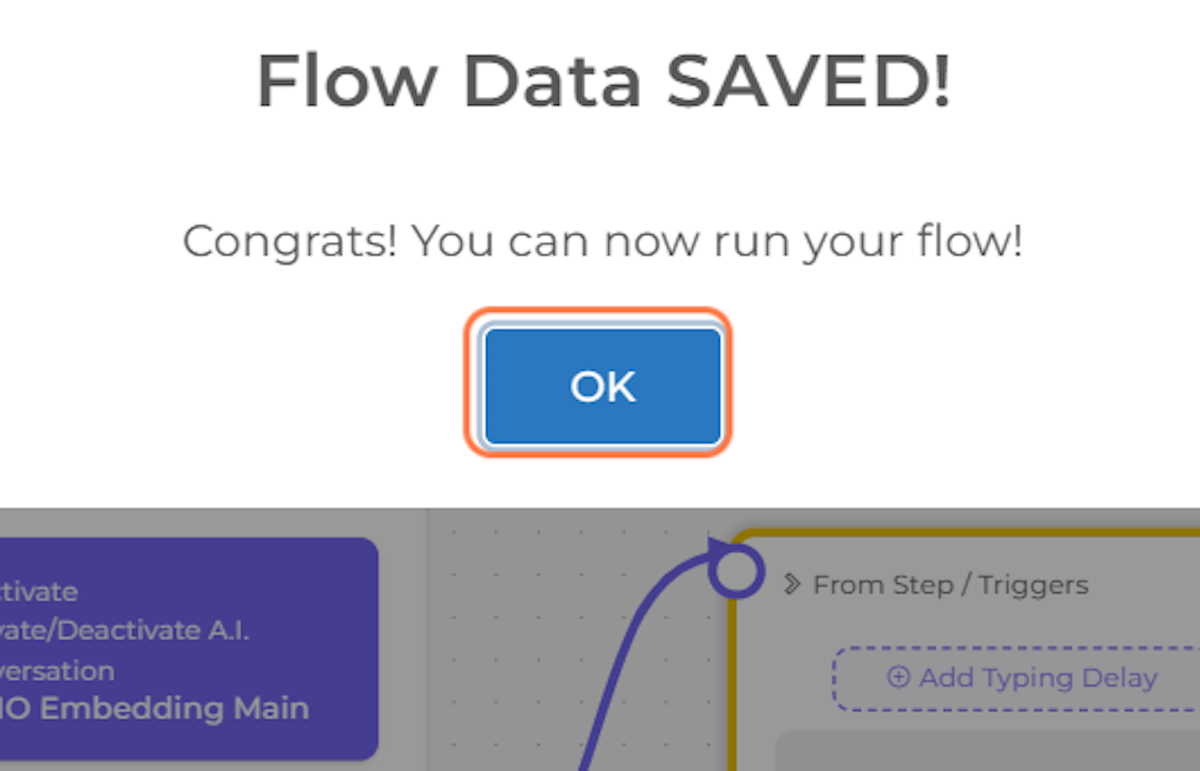
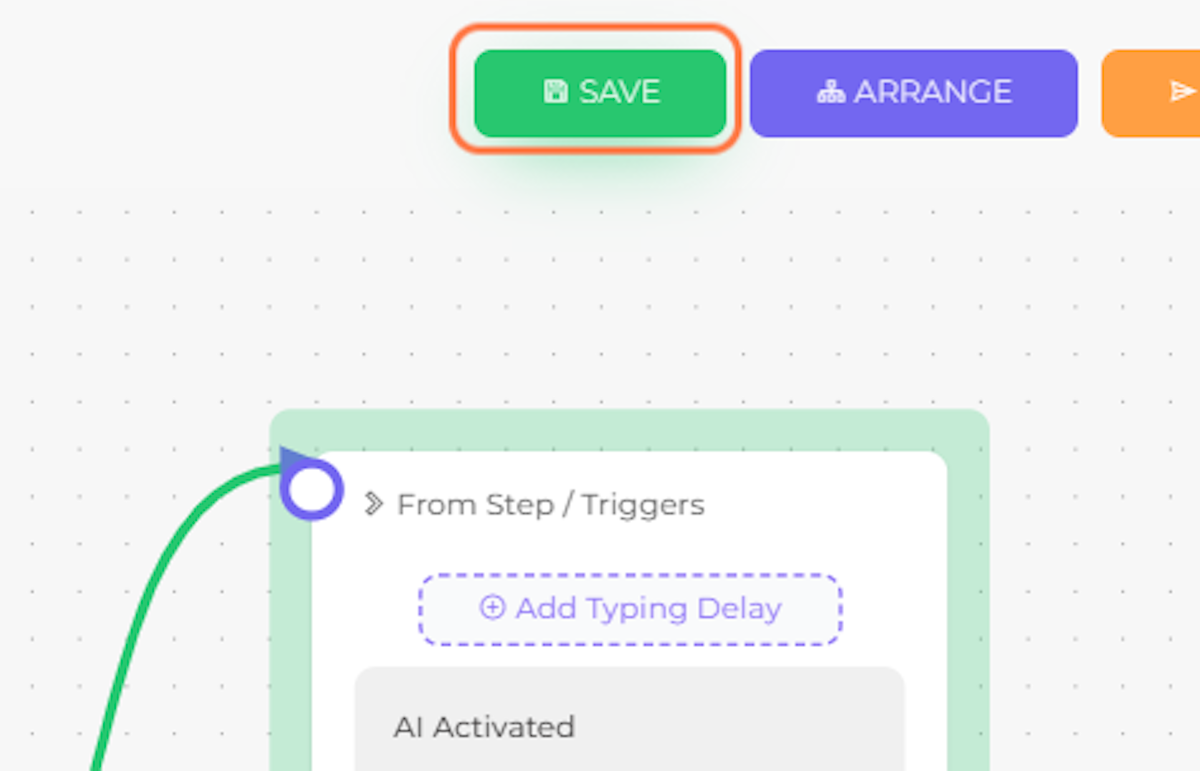
27. Click on SAVE
28. Click on OK